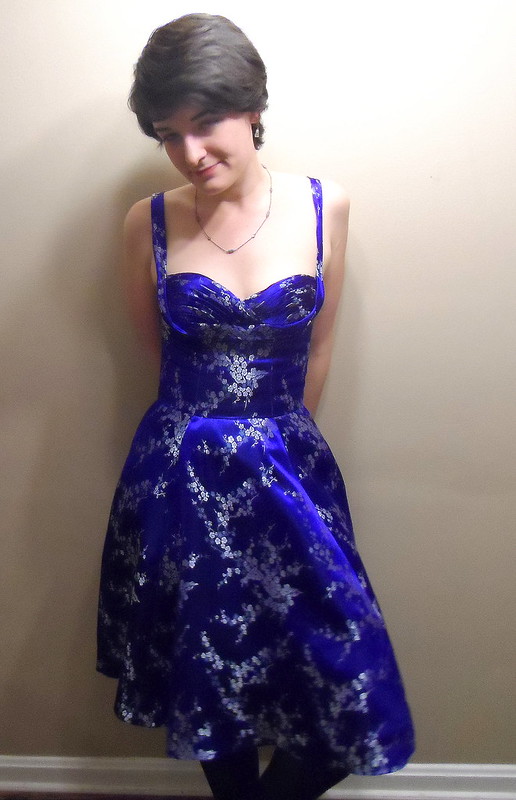
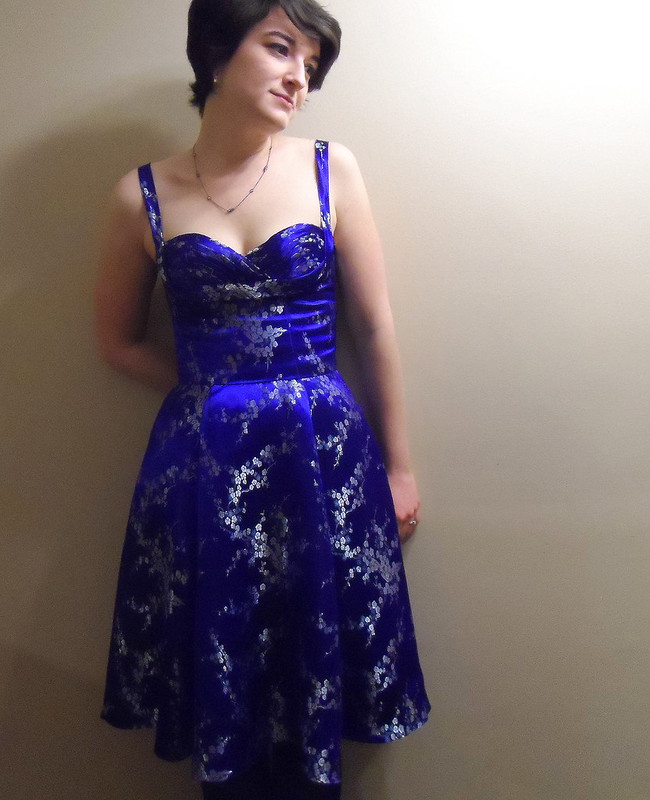
B5882 AKA Gertie's Shelf Bust Dress
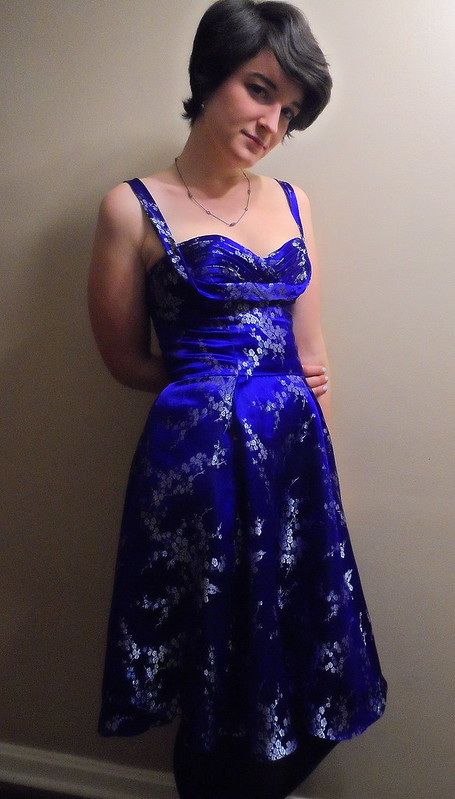
I used the Butterick Pattern but I altered it to fit me quite a bit. I wanted it to be snug around the top so there wouldn't be a wardrobe malfunction. I also wanted the bodice to curve under the bust more, since the strap actually comes across the center of the bust and not under it. I'm not large-chested in the least but I used some ideas from Gertie's blog in her "FBA" post for the alterations.

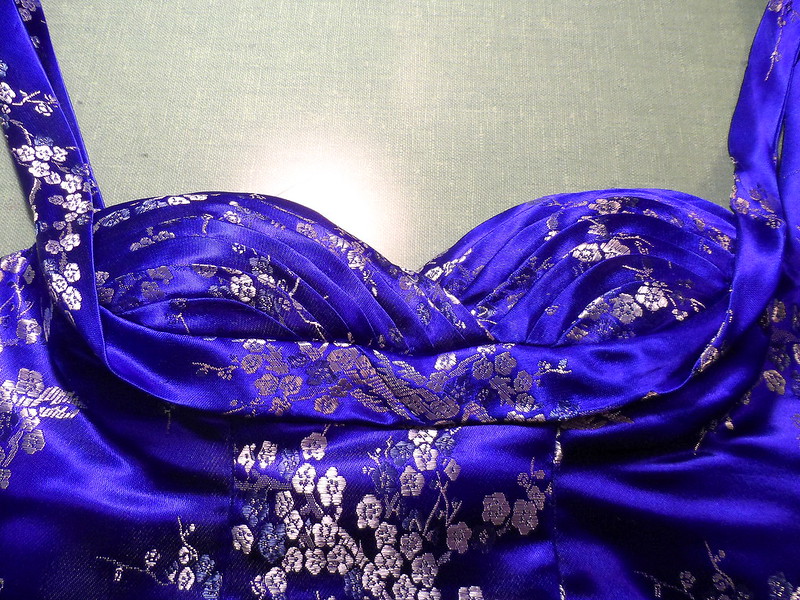
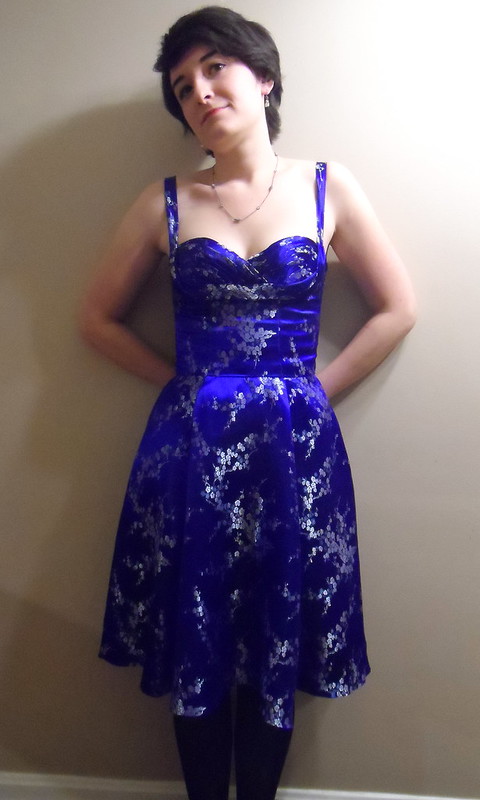
In the muslin stage I was able to get a basic understanding of the pattern and how it all went together. One thing I decided early on was that I didn't want to do the pleating the way the pattern instructed. The pattern has one piece of fabric folded at intervals and then sewn to a stay underneath. Judging from the pictures I found online of people who've made this pattern, the pleats tend to want to puff out and not stay down, which I think looks sloppy. What I did instead is cut out the stay in lining fabric and then attach individual bias cut strips by hand exactly where I wanted them to go. I learned this technique on sewing curved tucks from Kenneth King here.
The bulk of the instructions I followed were for Gertie's "Sew Retro" class on Craftsy. I've wanted to practice all of the techniques she illustrates, but I was never really fond of the bustier style pattern they give you with the class. I bought the blue brocade fabric from Bangkok Thai Silk online ages ago for the explicit purpose of making the Sew Retro dress, but when B5882 came out, I fell head over heels in love. It was time for a change of plans.
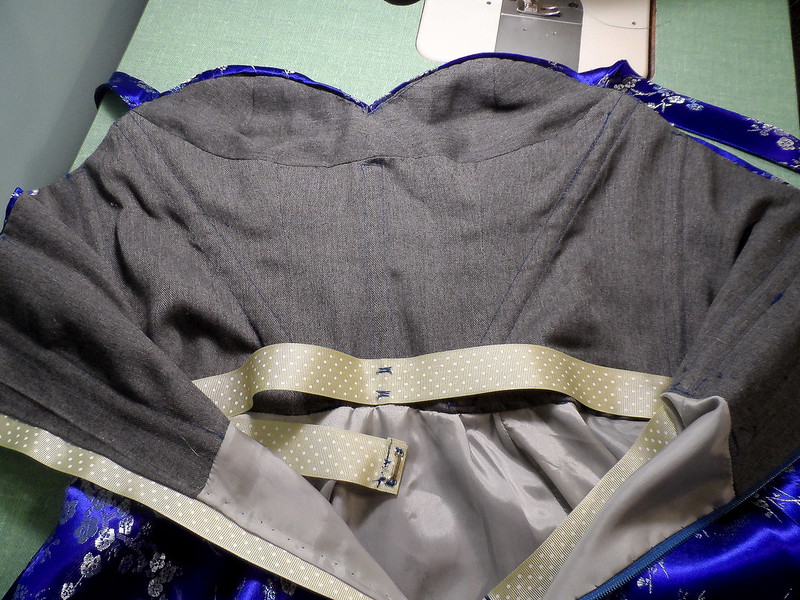
B5882 lent itself well to the class instructions with only a few modifications. I underlined the bodice in muslin, cut custom bra padding using the pattern pieces, attached spiral steel boning to the bodice lining, inserted a lapped zipper in the back, and used grosgrain ribbon to make a waist stay and zipper guard. I probably did other things that I can't remember now, too :)
As you can imagine, all of these techniques required a lot of hand stitching. Fortunately, since it was school vacation time, I had a lot of down time at work (aka lots of sitting at my computer with not much to do) which afforded me time to do hand work while waiting.
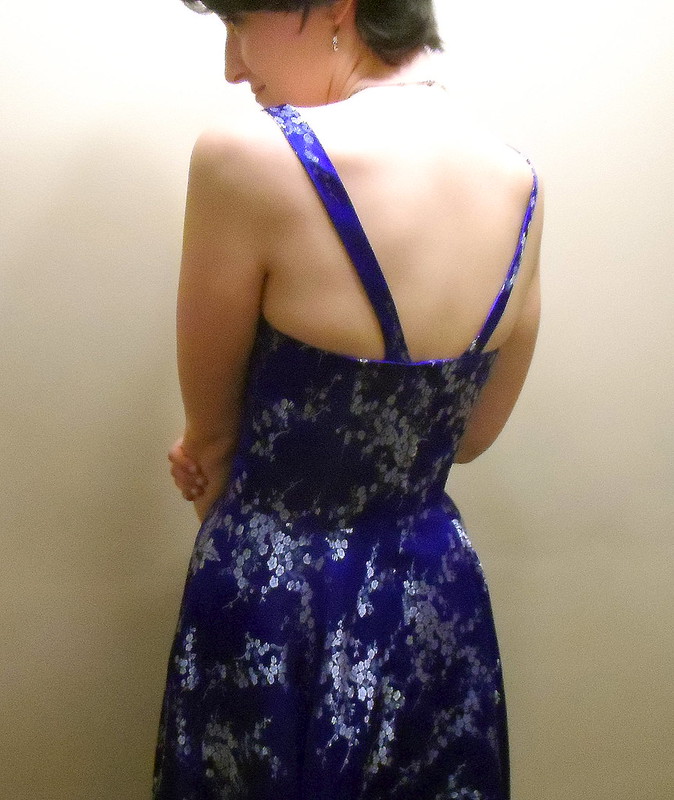
I only ran into two challenges in this dress. First of all, I barely.... BARELY.... had enough fabric for the skirt. And by "barely" mean that I cut a few inches of fullness off of each panel and completely ignored the grainlines in order to scrounge enough yardage so I wouldn't have a bare bottom. The problem is that the fabric is only 36 inches wide, and I had originally been planning on making a straight-skirted dress. Fortunately, I think this skirt still reads as almost a full circle, and it's plenty swirly enough to dance in. A trained eye might be able to tell that the grain falls kind of funny in the front, but it really doesn't bother me that much.
Second challenge: This fabric does NOT like to be sewn on the bias. It turns into a slippery, wormy mess the second it lands under a presser foot. So the strap (which is a very long bias strip folded in half) proved to be tricky. I had a hard time making it an even width all the way around. The one side of the strap never wanted (and still doesn't want) to lay flat, so whenever I would press it down I ended up getting folds and lumps. Once again, not the end of the world but hopefully no one examines it too closely.
I would still like to try my hand at making a petticoat to wear underneath to give the circle skirt a little more volume. The wedding I'm planning on wearing this to is on the 25th of January, so I have some time. I might take more pictures later when more poofiness has been added.
I really love this dress and am so glad that I finally took the leap and took the time to make it. Can't wait to wear this to the wedding this month and let all my friends see it :)
I love what you've done with this, the colour is stunning. I've been looking at a lot of people's versions of this pattern and your version is by far the neatest and most flattering. The idea of using individual bias strips for the pleated bust is genius!
ReplyDeleteOutrageously great!!! So inspired- well done you!
ReplyDeleteThis dress is gorgeous! ผ้าไหมยกดอก
ReplyDelete